In summary:
- Prioritize officially designated swimming areas; their invisible safety infrastructure drastically reduces risk.
- For unmarked beaches, learn to perform a 15-minute risk assessment by decoding wave patterns, currents, and water color.
- Understand that tidal timing, not just location, is a primary driver of risk, with mid-tide being the most dangerous period.
- For snorkeling, true safety extends to the reef’s health; choose operators and mineral-based sunscreens with discipline.
The image of a secluded island cove with turquoise water is the ultimate travel fantasy. Yet, for safety-conscious families, that beauty is often paired with a nagging question: is it truly safe to swim here? The search for « safe beaches » can lead down a rabbit hole of travel blogs with subjective opinions and outdated advice. Many swimmers rely on simple rules like « swim where others are, » but this offers a false sense of security. The truth is, the most stunning unmarked beaches can hide the most significant dangers, from powerful rip currents to sudden underwater drop-offs.
The conventional wisdom advises sticking to lifeguarded areas, which is sound advice. However, this doesn’t help when you’re exploring a remote island coast or traveling in the off-season. But what if the key to safety wasn’t just about finding a place with a lifeguard stand, but about developing the expertise to read the water yourself? This guide shifts the focus from passively searching for « safe » labels to actively mastering a risk-assessment framework. It’s about learning to decode the coastal environment, understanding the systems that make designated areas secure, and making informed decisions anywhere in the world.
By understanding the hidden infrastructure of official beaches and learning to interpret the ocean’s own warning signs, you can transform from a hopeful tourist into a confident and proactive coastal explorer. This article provides the actionable knowledge to assess any beach, understand the critical factor of timing, and ensure your presence is as safe for the environment as it is for you and your family.
Contents: Your Guide to Beach and Reef Safety
- Why Are Officially Designated Swimming Areas Safer Than Stunning Unmarked Beaches?
- How to Assess Beach Swimming Safety When There Are No Official Markers or Lifeguards?
- Lifeguarded Swimming Area or Secluded Beach: Which for Families With Children Under 10?
- The Beach Timing Mistake: Swimming During Tidal Current Changes and Rip Risk
- When Are Island Swimming Areas Staffed With Lifeguards Outside Peak Summer Season?
- How to Identify Whether a Turquoise Lagoon Is Safe for Swimming or Has Hidden Currents?
- How to Snorkel Coral Reefs Without Damaging Them: Buoyancy and Reef-Safe Sunscreen?
- How to Find Healthy Coral Reefs That Welcome Responsible Snorkellers?
Why Are Officially Designated Swimming Areas Safer Than Stunning Unmarked Beaches?
At first glance, an empty, picturesque beach seems far more appealing than a crowded, buoy-lined shore. However, the safety difference is not just about the presence of a lifeguard; it’s about a complex, often invisible, safety infrastructure. The statistics are stark. The U.S. National Weather Service reports the chance of drowning at a lifeguarded beach is just 1 in 18 million. In contrast, comprehensive data reveals a far grimmer picture elsewhere. According to an analysis by Water Safety USA, the fatality rate is five times higher in undesignated swimming areas compared to designated ones.
This dramatic difference is due to the systems operating behind the scenes. An officially designated swimming area isn’t just a patch of sand; it’s a managed environment. This includes regular water quality testing for harmful bacteria, established emergency vehicle access routes for rapid response, and active management of marine hazards like jellyfish blooms. These beaches use a system of warning flags—such as green for low hazard, yellow for medium hazard (moderate surf/currents), and red for high hazard (dangerous conditions)—to communicate real-time risk levels to the public.
The most critical components of this infrastructure include:
- Defined Swim Zone Boundaries: Buoy lines and depth markers create a clear, protected zone, separating swimmers from boat traffic, strong currents, and underwater hazards.
- Regular Water Quality Monitoring: Health departments test water for bacteria, with alerts issued if levels become unsafe for swimming.
- Hazard Management Systems: Organized monitoring for wildlife activity and public notification systems for urgent alerts.
- Rescue Equipment Stations: Strategically placed life jacket loaner kiosks, rescue tubes, and flotation devices provide immediate aid in an emergency, even before professional help arrives.
Choosing a designated beach means you are entering a zone where risks have been professionally assessed, managed, and communicated. That stunning, unmarked beach offers none of these protections, leaving all risk assessment and response solely up to you.
How to Assess Beach Swimming Safety When There Are No Official Markers or Lifeguards?
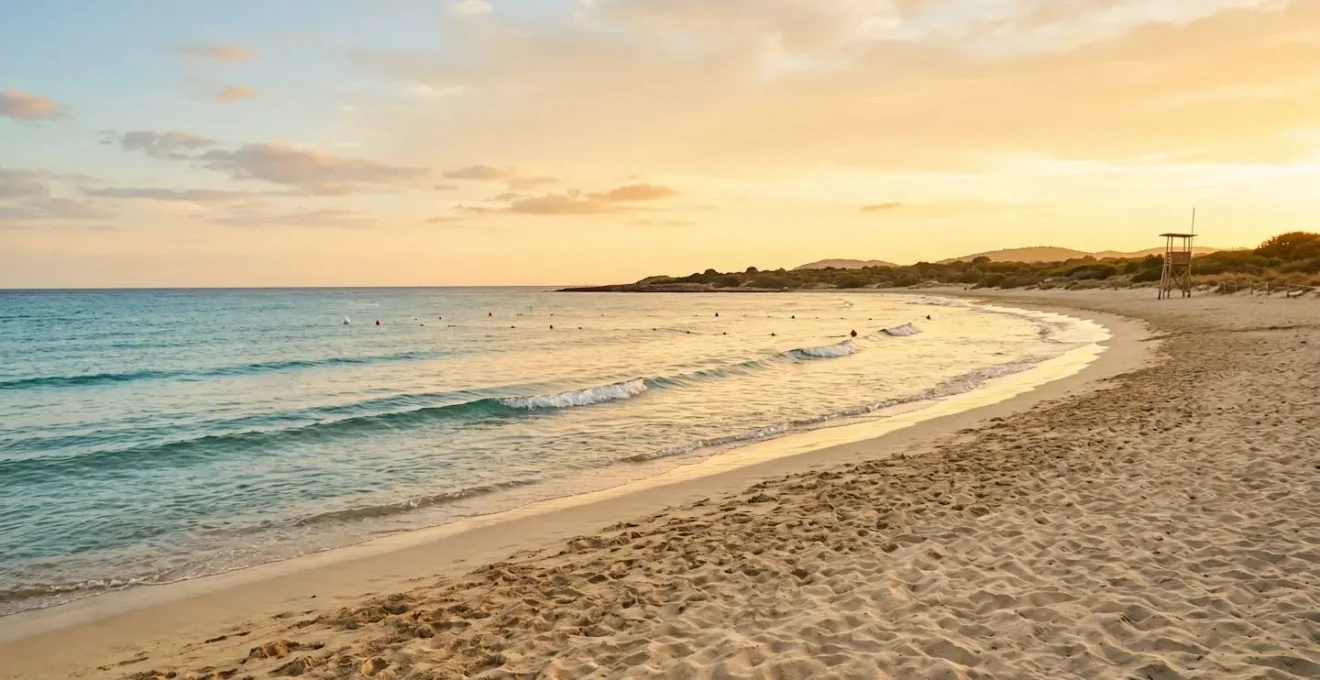
When you find yourself on a beautiful but unmarked island beach, you become your own lifeguard. This requires shifting from a passive sunbather to an active observer, using a process of environmental decoding to assess risk. Your primary tool is observation. Before anyone touches the water, dedicate 15 minutes to a systematic analysis of the beach and surf zone. The goal is to identify rip currents, which are the number one danger on surf beaches. They are not about being pulled under, but pulled out. A rip current is a narrow, fast-moving channel of water that flows away from the shore.
Look for clues that indicate their presence. A rip often appears as a deceptively calm patch of water in an area of otherwise breaking waves. This is because the outgoing current dampens the incoming waves. You might also see a channel of churning, choppy water, a line of foam or debris moving steadily out to sea, or a noticeable difference in water color.
As the image above illustrates, identifying these patterns of calm amidst the chaos is a key skill. The calm channel is the river of water heading out to sea. To systematize your observation, use a simple framework to guide your assessment and build a mental map of the beach’s hazards.
Your 15-Minute Beach Detective Framework
- Position & Observe (Minutes 0-3): Find an elevated vantage point if possible. Observe the overall wave patterns across the beach, noting where waves break consistently and where they don’t.
- Identify Wave Sets (Minutes 3-6): Count the waves in each set and time the interval between them. Look for the larger sets, which often reveal the underlying water movement more clearly.
- Spot the Calm (Minutes 6-9): Look for those ‘calm’ spots in the surf zone that could be rip currents. Watch for any foam, seaweed, or discoloration moving steadily seaward.
- Check Water Color (Minutes 9-12): Note variations in water color. Darker blue can mean deeper water, drop-offs, or channels, while murky brown water near the shore suggests poor quality from runoff.
- Confirm with Debris (Minutes 12-15): Watch floating objects or other swimmers to confirm current direction and speed. This provides real-world validation of your observations.
Lifeguarded Swimming Area or Secluded Beach: Which for Families With Children Under 10?
For families with young children, the choice between a lifeguarded beach and a secluded one involves a different risk calculation. While a lifeguarded beach is statistically safer, it can introduce a dangerous psychological factor known as ‘supervision dilution.’ Parents may subconsciously relax their vigilance, assuming the lifeguard is watching their specific child, which is an impossible task in a crowd. This paradox is a critical consideration for any parent.
As Dr. Peter Wernicki of the American Red Cross Scientific Advisory Council highlights, the danger is real:
The supervision dilution effect means that the presence of a lifeguard can paradoxically increase risk if parents reduce their own vigilance, believing the lifeguard is watching their specific child.
– Dr. Peter Wernicki, American Red Cross Scientific Advisory Council
A secluded beach forces constant, undistracted parental supervision, which is the single most effective safety measure for young children. However, it lacks the professional oversight and rapid emergency response of a lifeguarded area. To make an informed choice, parents should use a risk-benefit matrix to evaluate any beach, whether it’s lifeguarded or not. This decision framework, based on guidance from the American Red Cross, helps clarify the trade-offs.
| Beach Factor | Lifeguarded Beach Consideration | Secluded Beach Consideration | Recommended for Children Under 10 |
|---|---|---|---|
| Beach Gradient (Slope) | Variable; check with lifeguard about drop-offs | Requires personal inspection; steep drops are common and unmarked | Gradual slope (5+ feet to reach waist depth) ideal for all ages |
| Wave Type | Lifeguards monitor and close beach during dangerous conditions | No oversight; spilling waves (gentle) vs plunging waves (dangerous) distinction critical | Small spilling waves (<2 feet) only; avoid any plunging shore break |
| Visibility & Supervision | Professional oversight but can create parental complacency | Requires constant, undistracted parental vigilance (no phones, no reading) | Parent must maintain visual contact; child never out of arm’s reach for ages 5 and under |
| Distance to Medical Help | Typically <15 minutes to emergency services; on-site first aid | Can be 30+ minutes to help; no first aid equipment available | Proximity to medical care is a critical safety factor |
| Water Movement | Monitored for rip currents; flags indicate danger levels | Unmonitored; enclosed lagoons with minimal current are safer than open beach | Calm, waveless lagoon environment is the safest option for toddlers |
For children under 10, and especially those under 5, the ideal environment is a calm, waveless lagoon or a beach with a very gradual slope and small, spilling waves, regardless of lifeguard presence. The deciding factor must always be the parent’s ability to provide constant and undistracted supervision.
The Beach Timing Mistake: Swimming During Tidal Current Changes and Rip Risk
Many beachgoers check the weather but overlook an equally critical factor: tidal timing. The most powerful currents, including rip currents, are directly linked to the tidal cycle. Misunderstanding this relationship is a common and dangerous mistake. The sheer power of rip currents is hard to overstate; NOAA data shows that rip currents account for more than 80 percent of rescues performed by surf beach lifeguards. They can flow at speeds of up to 8 feet per second—faster than an Olympic swimmer.
The greatest risk isn’t at the peak of high or low tide, but during the periods in between, when the volume of water moving is at its maximum. The approximately 30-minute window around the exact moment of high and low tide is called ‘slack tide,’ when water movement is minimal and currents are weakest. This is the safest window for swimming. Conversely, the most dangerous period is mid-tide, roughly three hours after the tide turns, when tidal velocity reaches its peak. Swimming during these hours of rapid water movement significantly increases your risk of being caught in a strong current.
Learning to read a tide chart is as important as checking the weather forecast. It allows you to plan your beach time around the safest windows and avoid the periods of maximum risk. Here is a practical guide to interpreting tide charts for swimming safety:
- Identify ‘slack tide’ periods: Pinpoint the 30-minute windows around high and low tide. This is your safest swimming time as water movement is minimal.
- Avoid the ‘shoulder times’: The 2-3 hours immediately following high and low tide are when currents accelerate most rapidly. Exercise extreme caution during these periods.
- Recognize mid-tide as the most dangerous: Currents reach maximum velocity approximately halfway between high and low tide. This is the period of highest risk.
- Respect lagoon passes and channels: Tidal jets in narrow channels are far more powerful than beach rips. Treat them as one-way rivers, especially during spring tides.
- Cross-reference with the moon phase: Spring tides (at the new and full moon) create significantly stronger currents than neap tides (at quarter moons), amplifying all timing risks.
By aligning your swimming activities with the ocean’s natural rhythm, you can proactively reduce your exposure to one of the most common and powerful coastal hazards.
When Are Island Swimming Areas Staffed With Lifeguards Outside Peak Summer Season?
A common assumption is that lifeguard presence is dictated solely by good weather. In reality, it is often driven by economics and tourist seasons. Many popular island destinations reduce or eliminate lifeguard services during the ‘shoulder’ and off-seasons (typically autumn through spring), even when the weather remains perfect for swimming. This creates a dangerous gap where swimmers may see sunny skies and calm-looking water but have no professional oversight or emergency support. This is why developing personal risk assessment skills is so crucial for off-season travelers.
A prime example of this can be seen in the way some coastal states manage their resources. The case of Florida’s beach monitoring system provides a clear illustration of this seasonal, economic-driven model. It shows how even in a year-round tourist destination, safety services are not always constant.
Case Study: Florida’s Year-Round vs. Seasonal Beach Monitoring
Florida operates a differentiated beach monitoring system that reflects tourism patterns. According to the Florida Department of Health, water quality testing is more frequent during the peak tourist season (March-October). In winter months, sampling frequency is reduced in northern counties. This model demonstrates how monitoring and lifeguard presence are tied to economic factors and budget allocations, not just weather. While major hubs like Miami-Dade may maintain consistent services, other areas, including seasonal islands like the Florida Keys, can see a significant reduction in services between September and April, despite having favorable swimming conditions.
The key takeaway for any traveler is to never assume a beach is lifeguarded based on its reputation or the weather. Before visiting any island, especially outside of peak summer months, you must actively verify lifeguard schedules. The best sources for this information are official local government or parks department websites and visitor information centers. Always have a backup plan and be prepared to rely on your own assessment skills if you arrive to find an empty lifeguard chair.
How to Identify Whether a Turquoise Lagoon Is Safe for Swimming or Has Hidden Currents?
The crystal-clear, turquoise water of a tropical lagoon is perhaps the most alluring and deceptive of all coastal environments. Its apparent calmness can mask powerful currents, especially in lagoons with a pass or channel connecting to the open ocean. As the tide changes, vast amounts of water are forced through these narrow openings, creating strong, river-like flows that can easily overpower a swimmer. The beauty is a trap for the unwary, but for the trained observer, the water’s surface provides all the clues needed to assess the risk.
Instead of being mesmerized by the uniform turquoise, look for subtle variations and signs of movement. These are the indicators of the hidden plumbing at work beneath the surface. Water color itself is a primary clue: brilliant turquoise indicates a shallow, sandy bottom, while darker patches of blue or green signal deeper channels, seagrass beds, or coral reef structures. The boundaries between these colors are where water depth changes, and often where current speed accelerates.
The key is to read these surface clues before entering the water. Treat the lagoon not as a placid pool, but as a dynamic system. Here are the key indicators to look for:
- Water ‘Seams’ or ‘Lines’: Look for distinct boundaries where different water masses meet. These can appear as color changes, foam lines, or lines of floating debris stretching across the lagoon, marking the edge of a current.
- ‘Boil Spots’: Identify areas where the water surface seems to well up from below, creating a smooth, dome-like appearance. This indicates upwelling and strong underwater flow.
- Debris Movement Patterns: Watch how seaweed or leaves move across the surface. If they are moving consistently in one direction, especially if it’s against the wind, a strong subsurface current is present.
- Wind vs. Current: Surface water is pushed by wind. If you see debris moving significantly faster than you’d expect from the wind, or in a different direction, a powerful current is the cause.
By learning to spot these subtle signs, you can map the safe and unsafe zones of a lagoon and appreciate its beauty without falling victim to its hidden power.
How to Snorkel Coral Reefs Without Damaging Them: Buoyancy and Reef-Safe Sunscreen?
For the responsible traveler, safety extends beyond personal well-being to the health of the environment. When snorkeling, the goal is to be a passive observer, leaving no trace. The two biggest threats snorkelers pose to fragile coral reefs are physical contact and chemical pollution from sunscreen. Mastering these two areas is the foundation of responsible snorkeling. The most important skill is achieving neutral buoyancy, which allows you to float effortlessly above the reef, like an astronaut in space. This prevents accidental kicks, bumps, and scrapes that can break decades of coral growth in an instant.
Proper technique involves lying horizontally on the surface and using small, controlled fin kicks that originate from your hips, not your knees. Your arms should be relaxed at your sides, not used for swimming. If you are not a strong swimmer, wearing a snorkel vest is essential. It allows you to add a small amount of air for effortless flotation, ensuring you maintain a safe distance above the coral at all times.
The second critical element is your sunscreen. Many common chemical sunscreens contain ingredients like oxybenzone and octinoxate, which are highly toxic to coral, causing bleaching and DNA damage even at minuscule concentrations. Choosing a ‘reef-safe’ sunscreen is not a marketing gimmick; it’s an ecological necessity. The only truly reef-safe options are mineral-based sunscreens that use non-nano zinc oxide or non-nano titanium dioxide as their active ingredients. However, even the right product can be harmful if applied incorrectly. Proper application ensures the sunscreen binds to your skin rather than washing off into the water.
- Product Selection: Choose a mineral-based sunscreen with non-nano zinc oxide (20%+) or titanium dioxide. Avoid all chemical filters.
- Application Timing: This is critical. Apply sunscreen at least 20-30 minutes before entering the water, while your skin is completely dry. This allows it to bind properly.
- Quantity and Coverage: Use about one ounce (a shot glass full) for your whole body. Don’t forget your back, ears, and the backs of your knees and feet.
- Layering Strategy: For best results, apply a thin layer, wait 5 minutes for it to set, then apply a second thin layer. This greatly improves adhesion.
- Reapplication Protocol: Reapply every 80 minutes of water time or after towel-drying, and always wait 15-20 minutes before getting back in the water.
Key Takeaways
- Officially designated beaches are statistically far safer due to a hidden infrastructure of monitoring, hazard management, and emergency planning.
- For any unmarked beach, a 15-minute observation framework to decode wave patterns, water color, and current movement is a non-negotiable safety practice.
- For families, constant, undistracted supervision is the primary safety layer, and a lifeguarded beach should not lead to parental complacency.
How to Find Healthy Coral Reefs That Welcome Responsible Snorkellers?
Finding vibrant, healthy coral reefs is the ultimate goal for any snorkeler, but it requires looking beyond generic « best snorkeling » lists. The healthiest reefs are almost always those under active management and protection. This means your search should focus on finding destinations with official designations like Marine Protected Areas (MPAs), National Marine Sanctuaries, and UNESCO Biosphere Reserves. These areas implement science-based rules that protect the ecosystem from overuse and damage, resulting in more abundant and healthier marine life.
The difference between protected and unprotected reefs is significant. The management practices within these zones directly contribute to their health and resilience, making them premier destinations for responsible snorkeling.
Case Study: The Success of Marine Protected Areas
MPAs are the gold standard for sustainable marine tourism. As noted in analyses of coastal water management programs, these zones enforce strict rules, limit visitor numbers, and invest in restoration. For example, Hawaii’s Hanauma Bay requires all visitors to watch an educational video before entry, while the Florida Keys National Marine Sanctuary uses mooring buoys to prevent destructive anchor damage. Studies consistently show that reefs within these MPAs have 30-50% higher coral cover and fish abundance compared to adjacent, unprotected areas. Prioritizing destinations with official MPA status is the most effective strategy for finding healthy reefs.
Equally important is choosing a responsible tour operator. A good operator acts as a guardian of the reef, not just a taxi service. They play a crucial role in educating guests and enforcing best practices. Vetting an operator before you book is a key part of being a responsible tourist. A few simple questions can reveal whether their practices align with conservation principles.
Checklist for Vetting Snorkel Tour Operators
- Conservation Briefing: Do they provide a mandatory pre-tour briefing covering no-touch policies, buoyancy control, and reef ecology? This should be at least 10 minutes long.
- Group Size: Do they limit groups to a maximum of 8-12 snorkelers per guide? Small groups are essential for proper supervision and minimizing impact.
- Reef Involvement: Are they actively involved in local reef restoration or conservation projects? Ask for specifics.
- Enforcement Policy: Do they have and enforce a strict ‘no-touch’ policy with clear consequences for violators?
- Skill Assessment: Do they assess snorkelers’ abilities and provide flotation vests to those who need them to ensure proper buoyancy and prevent reef contact?
Now that you are equipped with the framework to assess risk and make responsible choices, the next step is to integrate this knowledge into every aspect of your island travel planning. Start today by researching the official beach safety resources and designated marine parks for your next destination.